This wild fermented soda is a great way to enjoy the flavors of your local forest and makes a refreshing drink after a hike. You can brew this soda with any edible (unripe) pinecones, including fir, spruce, pine, and mountain hemlock.
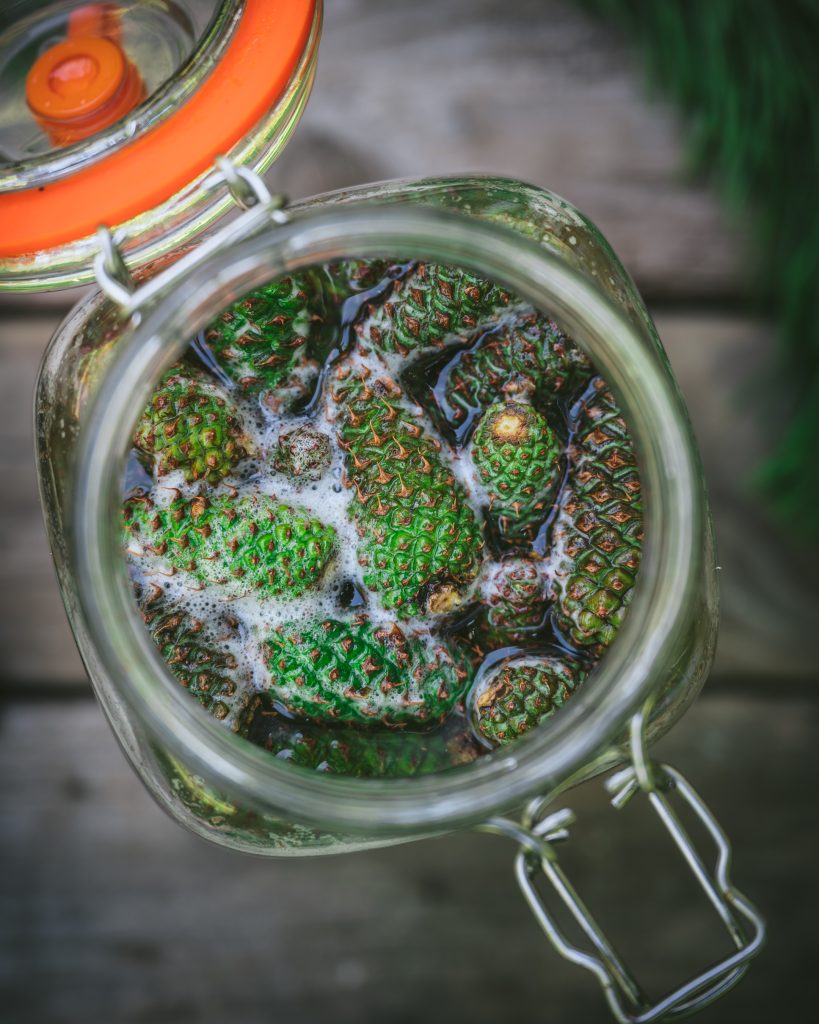
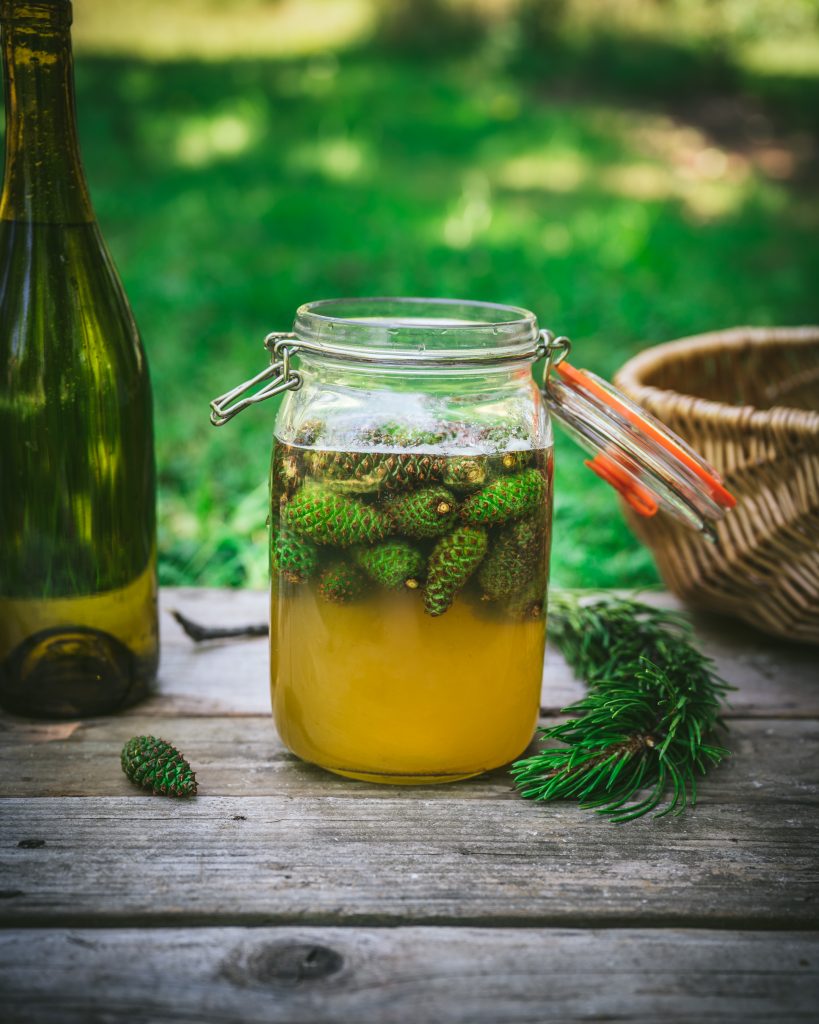
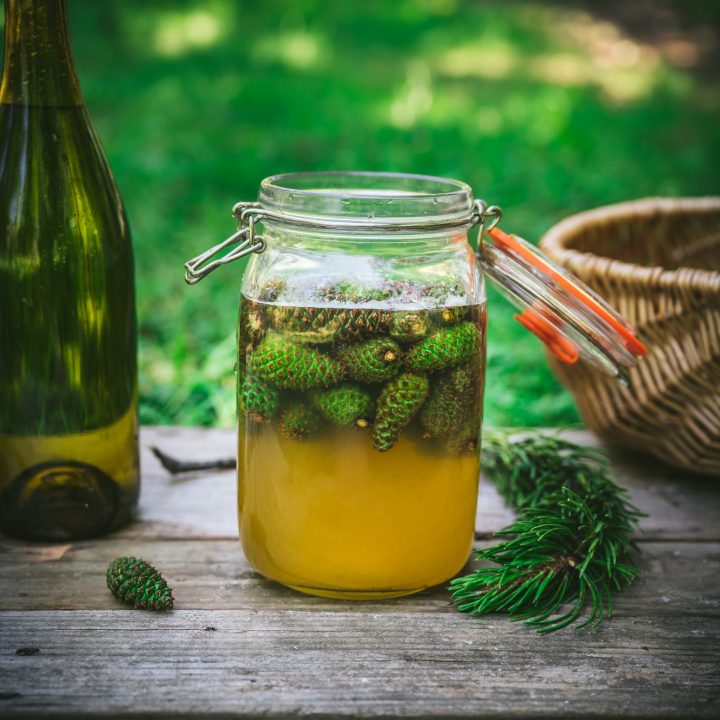
Pinecone soda is a wild fermented beverage made from unripe (green) pinecones, sugar, and water. This soda tastes just incredible, like lemons, pineapple, and pine.
Pinecones are a great source of wild yeast, so will result in a vigorous fermentation within 1 to 2 days without any additional yeast sources. Because of this, unripe pinecone soda is one of the easiest wild fermented sodas you can make.
Unripe pinecones are one of the best sources for wild yeast. They can be cultivated to make yeast starters, similar to how you would make a ginger bug.
What Does Unripe Pinecone Soda Taste Like?
Pinecone soda tastes like citrus, pine, and pineapple without any of the tannins you would get from mature pine needles. Unripe pinecones have all the flavors and benefits of pine needles, which are high in vitamin C, antioxidants, only in a more concentrated form.
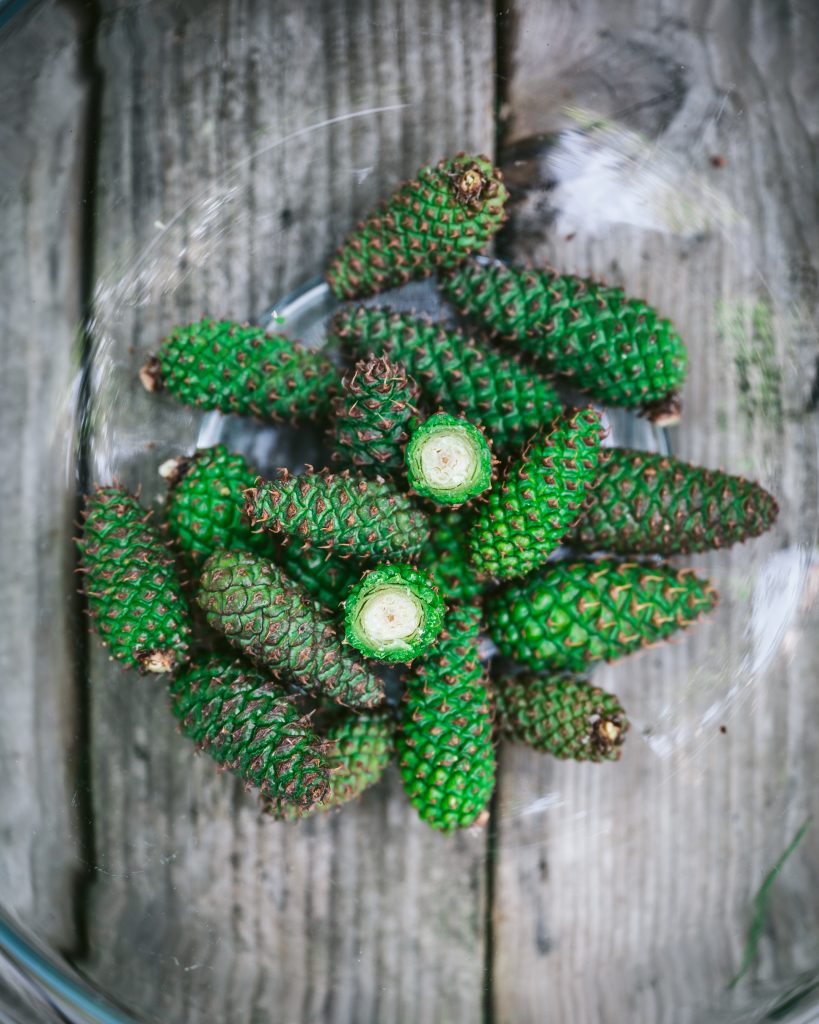
For the soda, you only want to use green (unripe) pinecones only. Avoid the brown mature cones, which are woody and have lost their flavor. A good way to test for ripeness is by cutting through one of the pinecones. It should be soft, juicy, and white on the inside.
All pinecones have different flavors, so it’s fun to experiment with different varieties from the conifers that grow in the forest where you live. Some are more piney and sour, while others have tropical flavors like pineapple!
When To Harvest Pinecones
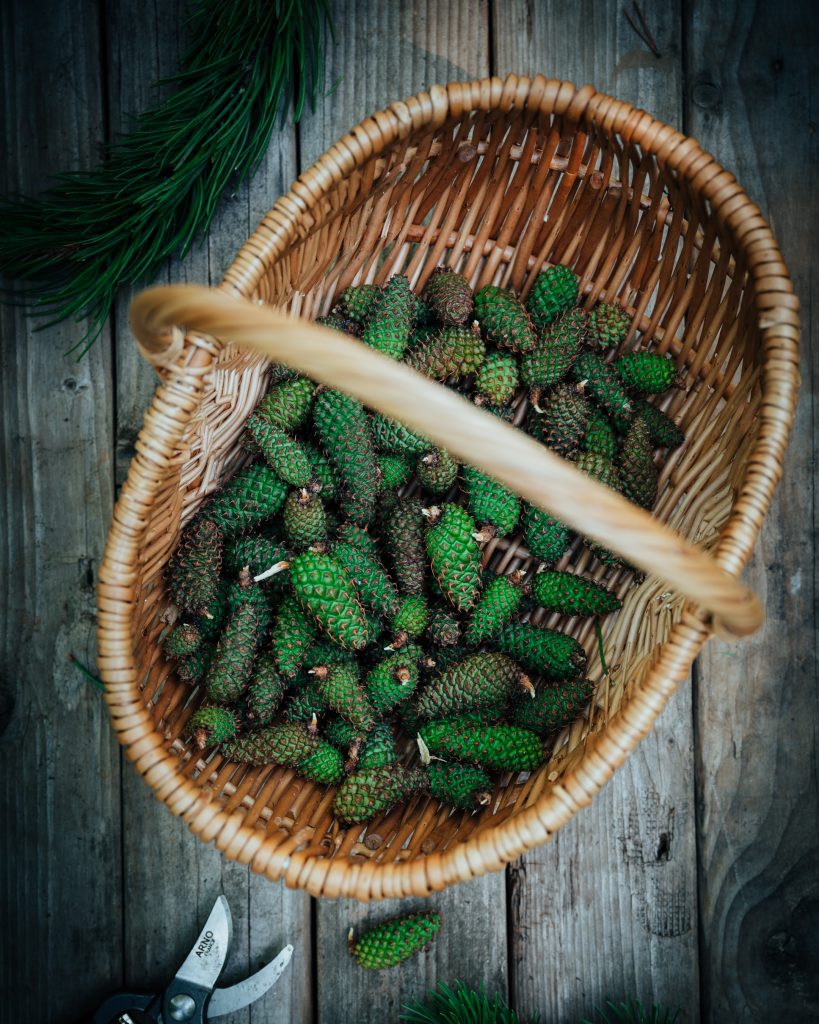
Pinecones are typically ready to harvest in early spring to summer, depending on the elevation and temperature. You may have to get creative to reach pinecones, and hike a fair amount to harvest enough pinecones.
Look for pinecones that are green are still closed. Cut one open to test if it’s soft and white on the inside. You want the ones that cut through with no difficulty and are still “juicy” on this inside.
I harvested green pinecones in the mountains of central Oregon in August, which was rather late. However, at lower elevations I have seen green pinecones ready for picking much earlier in spring.
Which Pinecones Are Edible?
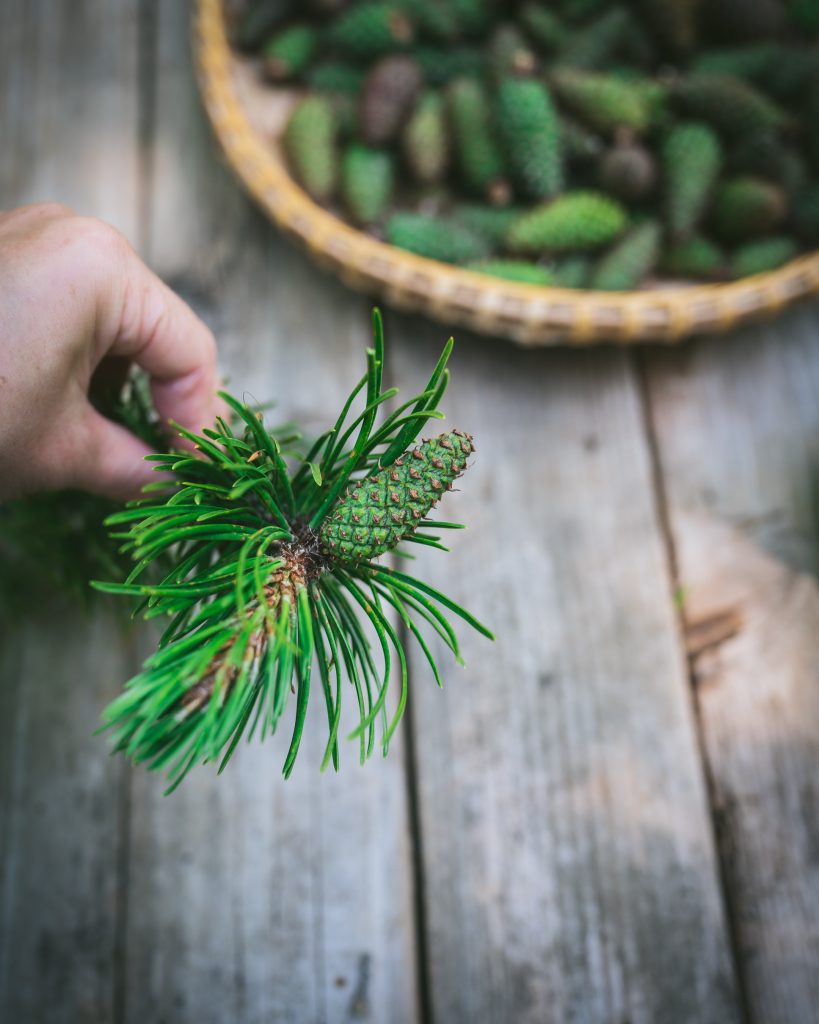
You can use pinecones from any edible conifer trees such as fir, spruce, and most pine. Each different conifer has variations in flavor, so no two sodas will taste the same. Some conifers have better flavors than others, so you may have to do a bit of experimenting.
Pinon pine, balsam fir, blue spruce, and Eastern white pine all have exceptional flavors. However, if you don’t have these conifers near you, try the ones that do grow nearby!
In the PNW where I live, we mostly have Douglas fir, balsam fir, and hemlock to name a few. In the fall, the squirells go after the juicy balsam fir pinecones that grow up high in the trees. I usually can find large amounts knocked over and those are gold!
If you don’t know which conifers have edible needles and cones, a good place to start is with a field guide on edible and medicinal plants for your area.
See if you can find a local forager or herbalist to go on plant walks with. A mentor can be incredbibly helpful to learn faster and give you greater confidence as a beginning forager.
Are Pinecones Safe to Consume?
Most pinecones are safe to use for making fermented soda or pinecone syrup, providing they come from edible conifer trees. However, there are some varieties contain harmful toxins.
There are a few known toxic varieties of conifer trees such as Yew (Taxus), Norfolk Island Pine (Araucana heterophylla), and Ponderosa Pine (Pinus ponderosa).
How To Harvest Pinecones
First, make sure to only harvest from trees that you are reasonably sure are free from disease, pests, and away from sources of pollution such as roads.
Once you have located a grove of pine trees with pinecones, the fun begins! Look for smaller trees that you can reach the pinecones. Typically, there will be a few pincecones on the lower branches.
The tops of trees will often be loaded with pinecones, but those are usually out of reach. If you happen on a recent logging site, you might get lucky and find tree tops left on the ground that are loaded with green pinecones.
Use thick gloves to protect your hands from the sharp spikes on the pinescones. Grasp the pinecone, and twist it off the branch until it comes free.
Or, use a good pair of secateurs to cut the pinecone off at the base. I recommend this method if you remember to bring clippers, it’s much easier than twisting the pinecones off by hand.
How To Brew Wildcrafted Pinecone Soda
1. Forage Unripe Pinecones
First, you will need to go on a hike to harvest a good amount of unripe pinecones! You will need s enough pinecones to fill your jar at least half full. This could take a few minutes to an hour depending on how many pinecones you can find and reach.
2. Sanitize Your Fermentation Vessel
Use plenty of soap hot water to thoroughly clean the fermentation vessel and any equipment you will use to make the soda. You can use a sanitizer, such as One Step or Star San if desired.
For fermented beverages that are intented to be consumed quickly, I simply use hot water and soap to clean my supplies and have never had an issue with mold or spoiling.
However, for a longer fermentation that I intend to age, such as mead, I do sanitize first with Star San. Better safe than having to discard a whole jar of wildcrafted brew!
3. Fill Your Jar with Pinecones
Fill the fermentation jar with 1/2 to 1/3 full with unripe pinecones. No need to cut the pinecones up or to pact them in, just place them into a sanitized jar and fill with filtered water or spring water.
4. Add Sugar Source
Add sugar and mix well until dissolved. The yeast feeds on sugar, so you will need to add enough sugar to ensure a successful fermentation. Don’t be alarmed by how much sugar you need to add. Remember that very little sugar will remain in the final product, because the yeast consumes it and converts it into alcohol.
A good starting place is to add 1.5 to 2 cups of sugar for 1 gallon of water. It should taste overly sweet initially. I alwasy taste it to gage how much sugar to add, and also add more as needed during the fermentation.
The sugar source can be raw honey, maple syrup, cane sugar, or even white sugar. The type of sugar used also affects the flavor of the beverage. White sugar and honey makes the brew taste lighter like cider or soda, while brown sugar and molasses will result in a beer-like flavor.
5. Cover and Ferment for 3-5 days
Once you have added the sugar, close the jar, but not too tightly so fermentation gases can escape. You can simply open the jar every day to allow traped gases to escape, or if using a mason jar leave the top screwed on loosely.
If you have a gallon jar with an airlock lid, this is an excellent choice for fermenting soda. The airlock allows the gases to escape, but prevents oxygen and bacterial from getting into the soda.
Or keep it simple and cover the jar with a tightly woven cloth secured with string. The important thing is to keep the jar covered to keep out dust and insects.
Check the fermentation once a day, and stir it with a clean spoon several times a day to keep the sugar and yeast distributed. You should begin to see small fermenation bubbles within 1-3 days, sooner in warmer temperatures.
Taste the soda every day once the fermenation is going. This will tell you if it needs more sugar and help you decide how the flavor is developing.
6. Transfer to Bottles for Secondary Fermenation
The final step before drinking is to bottle and allow carbonantion to build. This is the step where that gives you fizzy soda.
Using a funnel, pour the soda into bottles that can hold pressure. I use flip-top glass bottles for bottling fermentated soda, because they can safely hold a decent amount of pressure.
Leave the cloudy sediment behind at the bottom of the fermentation jar. This sediment is simply yeast and bacterial that are the byproducts of yeast fermentation.
It’s nothing to be concerned about but for best flavor and clarity, leave it out.
Once bottled, ferment the soda for an additional 8 hours at room temperature, then check the pressure. If it needs additional carbonation, close and let sit another 8 hours. Check pressure.
It’s very important to release the pressure at least once a day, especially in warm temperatures. This is called “burping” the bottles and allows the excess pressure to be released so the bottles don’t explode. It’s also a good idea to store the bottles in an enclosed space (I’ve used an unused shower) to safely contain any explosions.
7. Refrigerator and Enjoy!
Once carbonated, transfer the soda bottles immediately to the refrigerator. Refrigeration slows the fermentation down so you can safely store it for several weeks before drinking.
Remember that fermented pinecone soda is still an active fermentation. This means it will continue fermenting and build pressure at room temperature. If you wait too long the soda will gush out and make quite a mess when you open it.
If you notice the soda is still a bit cloudy, this is just the yeast and will settle on the bottom after a couple days. Fermented pinecone soda is best served chilled and enjoyed young.

Wild Fermented Pinecone Soda
Green (unripe) pinecone soda is a wild fermented soda made with just three ingredients: pinecones, water, and sugar. It tastes like the forest with notes of pine, citrus, and pineapple.
Ingredients
- Unripe pinecones, enough to fill 1/3 to 1/2 a gallon
- 3 quarts (96 oz) water, non-chlorinated
- 2 cups raw honey
Instructions
- Forage unripe pinecones from trees you are sure are free from spray and pesticides. You will need enough pinecones to fill your jar at least half full. This could take a few minutes to an hour depending on how many pinecones you can find and reach.
- Sanitize your fermentation vessel and all equipment you will be using to make the soda. Use plenty of hot water and soap to thoroughly clean the fermentation vessel and any equipment you will use to make the soda. You can use sanitizer, such as One Step or Star San if desired.
- Fill a gallon jar 1/2 to 1/3 with pinecones. Add the honey or sugar and top with water. Fill the remainder of the jar with water, leaving a few inches of space at the top. Close the jar tightly and shake to dissolve the honey. If you don't have a lid for your jar, do the best you can mixing with a clean spoon.
- Cover the jar with a tightly woven cloth or a lid with an airlock to keep critters out and allow fermentation gases to escape.
- Ferment at room temperature for 3-5 days. Mix the pinecones that are floating at the top with a clean spoon several times a day. Taste the soda and add more honey as needed. The longer it ferments, the higher the alcohol content will be.
- Transfer to bottles for carbonation. Use a funnel to carefully pour the soda into flip-top bottles, leaving behind the sediment at the bottom of the fermentation vessel. Leave 2-3 inches of space in each bottle. Let the bottles sit at room temperature for 8 to 12 hours, and check for pressure by opening the bottles.
- Ferment for another 8 hours until the soda is carbonated. Once nice and fizzy, transfer to the refrigerator. This slows down the fermentation so the pressure builds at a slower rate. Allow the bottles to sit for a few days so the yeast settles on the bottom. Drink chilled.
Notes
Unripe pinecones are a wonderful source of wild yeast, and result in a successful fermentation with no additional yeast sources.
No Comments